
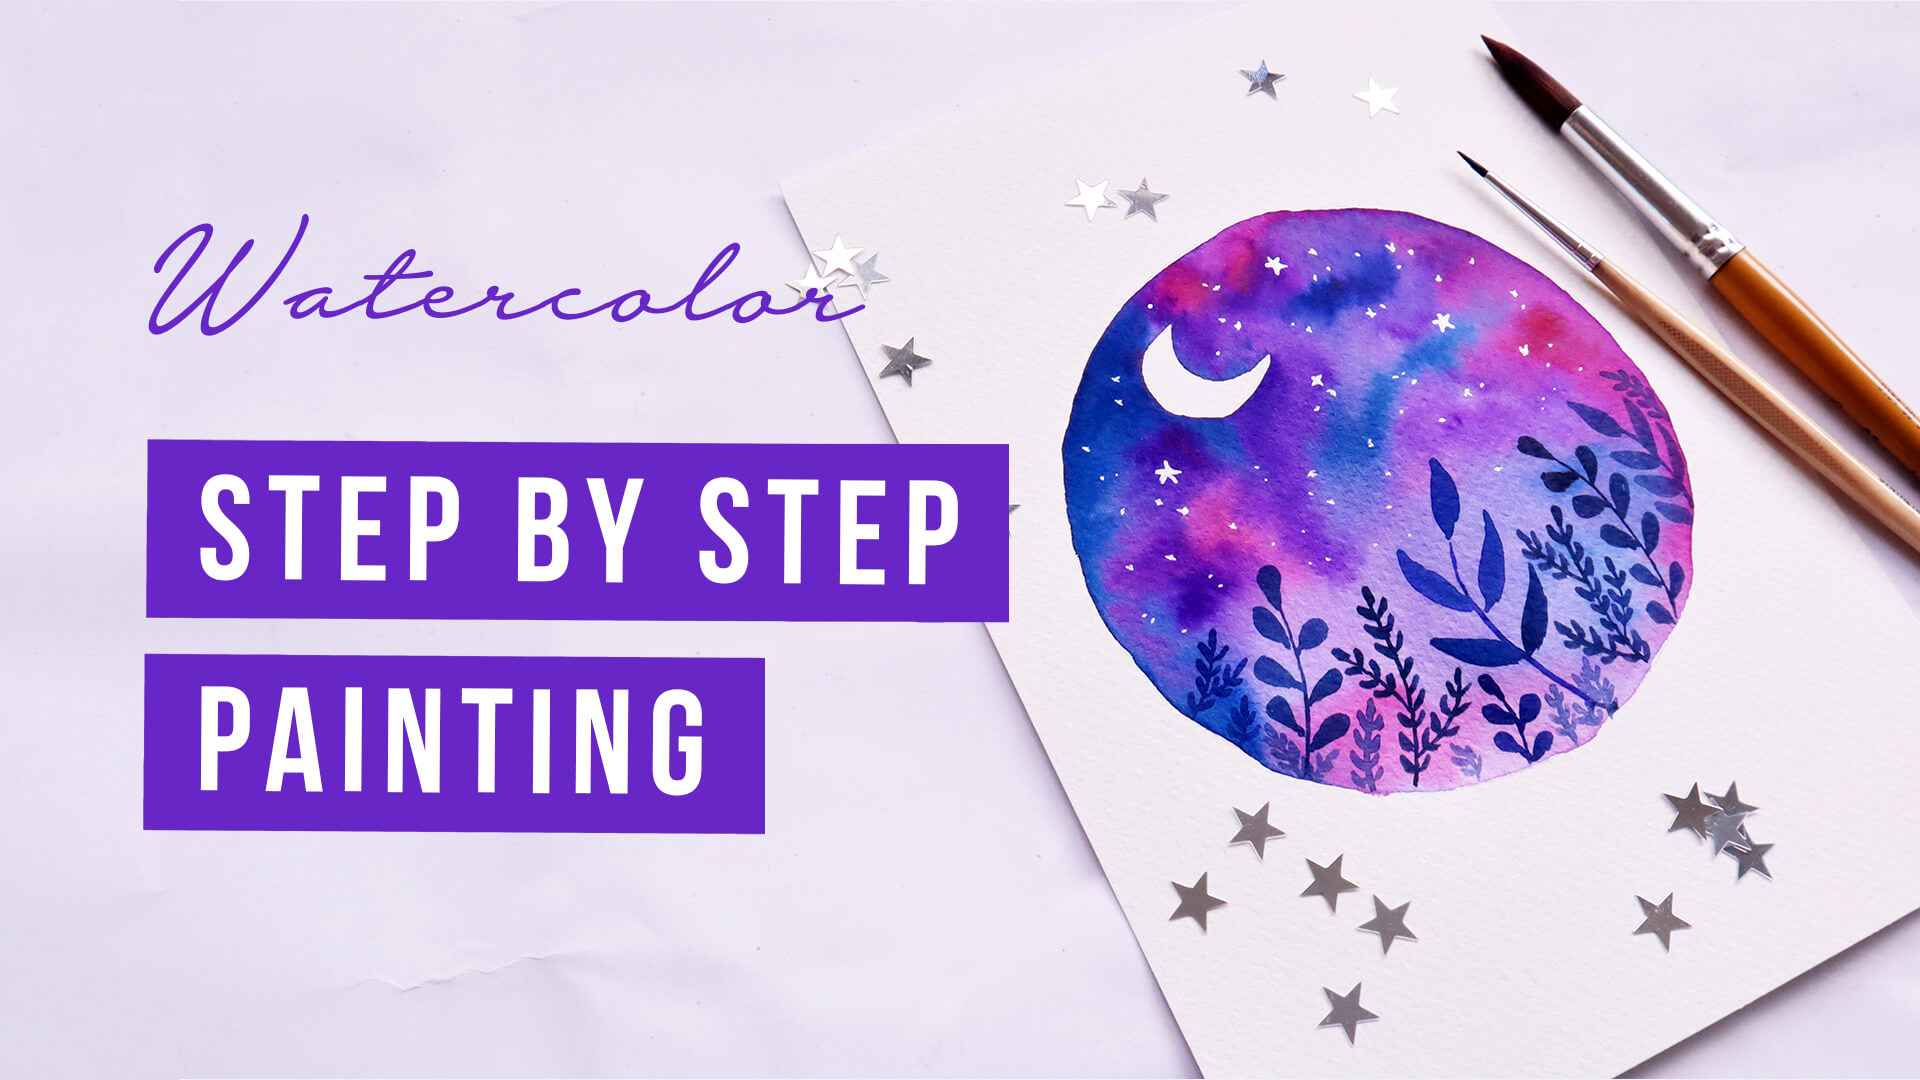
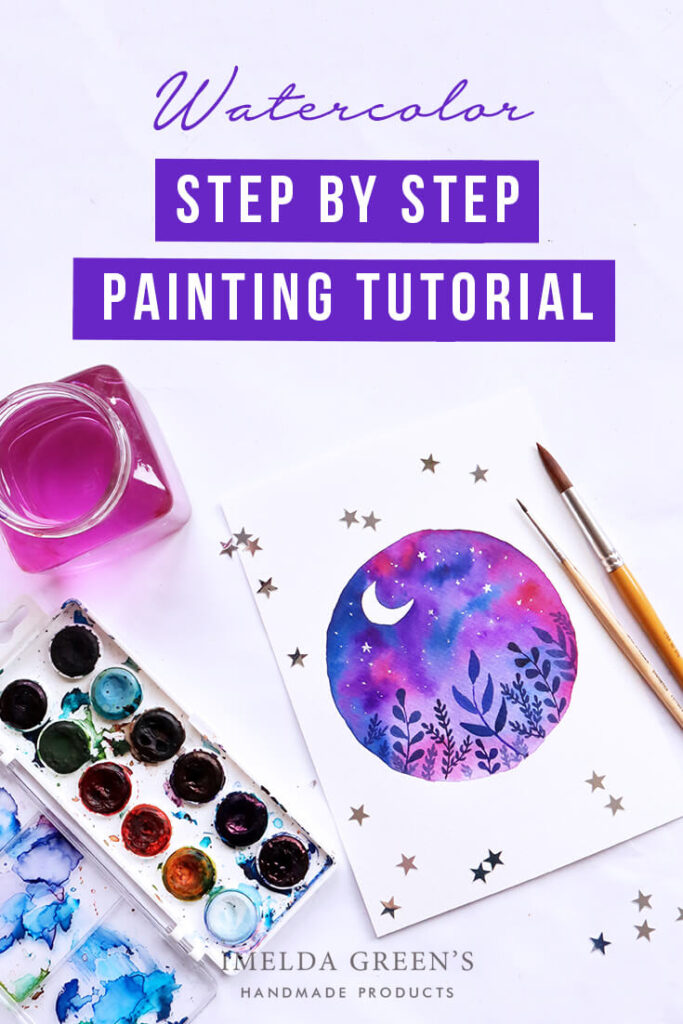
Watercolour painting class – step by step painting
In today’s post I’m going to teach you how to paint this very easy watercolour painting using wet-on-wet and wet-on-dry watercolour techniques.
Supplies
If you want to paint along, you’ll need the following supplies
- – watercolour paint
- – a smaller (2-4) and larger (8-10) size synthehic watercolour brush (pointed, round)
- – an A5 size watercolour paper (you can use different size if you are more comfortable working smaller/bigger)
- – water
- – a paper towel
- – a white or silver gel pen for the stars
- – a pencil & eraser for sketching

Painting process
In a nutshell, we will sketch the painting first, then paint the background with the wet-on-wet technique. Then we wait for that to dry and then paint the leaves.
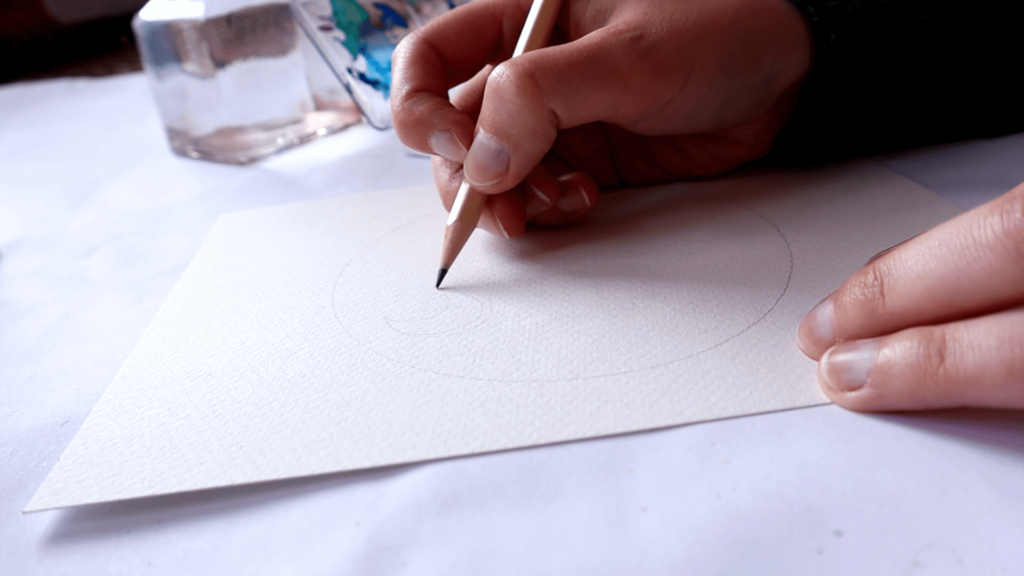
Step 1 – Sketching
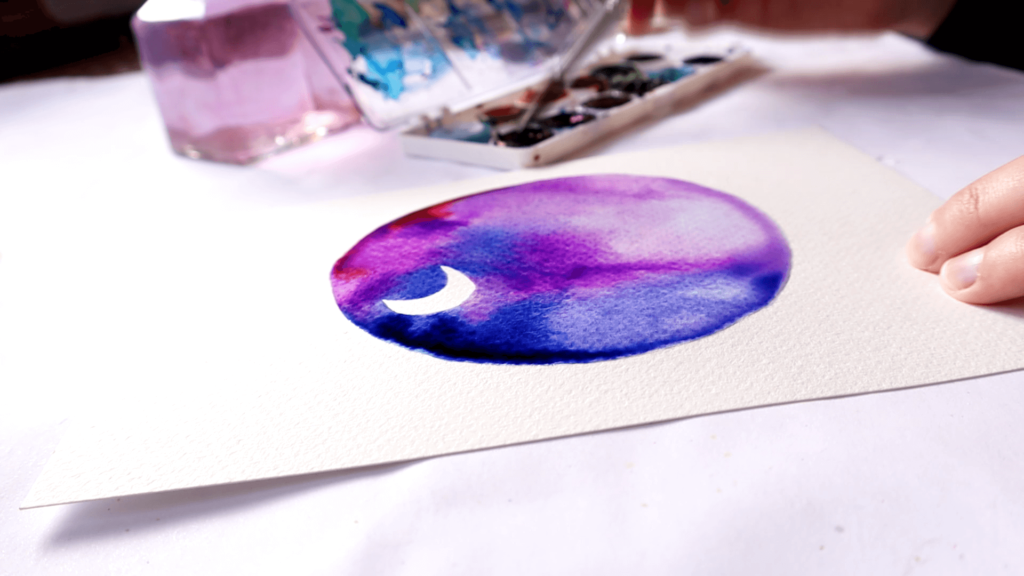
I draw a circle in the middle of the page. You don’t have to worry too much about how accurate your circle is but if you are a control freak (like me), you can put a bowl upside down on your paper to trace the circle.
Before I start painting, I also sketch the moon. I will leave this area blank while painting the sky.
Step 2 – Painting the background with wet-on-wet
In this first layer I use the wet-on-wet technique to paint the sky. I use my bigger brush for wetting my circle, leaving out the moon shape. You can use excessive amounts of water, it doesn’t matter if the paper soaks – that is why we use watercolour paper. However, if you use too little water, it will get dry too quickly and the effect won’t work.
Now that my background is wet, I take up some pigments with my brush and start blotting the wet surface. My first choice of colour is ultramarine blue. I don’t have to pay much attention to the moon anymore, because the pigments only move in the wet surface, and since the moon is dry, my paint won’t stain that area.
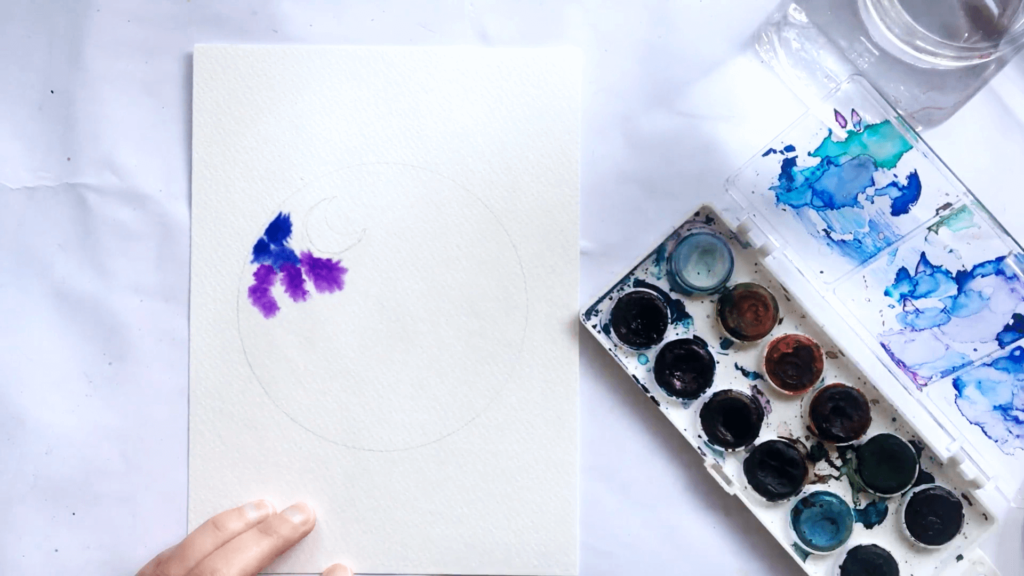
I rinse my brush now and take up another pigment, which is going to be purple, and I blot the surface again. If your surface is still wet, you should see the colours blending into each other. The beauty of this technique lies in letting the colours mix without trying to control them.
My last colour to add to the mixture is red and I just repeat the blotting exercise. I chose the blue-purple-red colours for the witchy effect, but you can use almost any combination you like, but you will get the best results if you choose colours that are next to each other on the color wheel. You can explore how the colour wheel works in my detailed colour course on Skillshare, which would explain a great deal about why these combinations give you the most beautiful results.
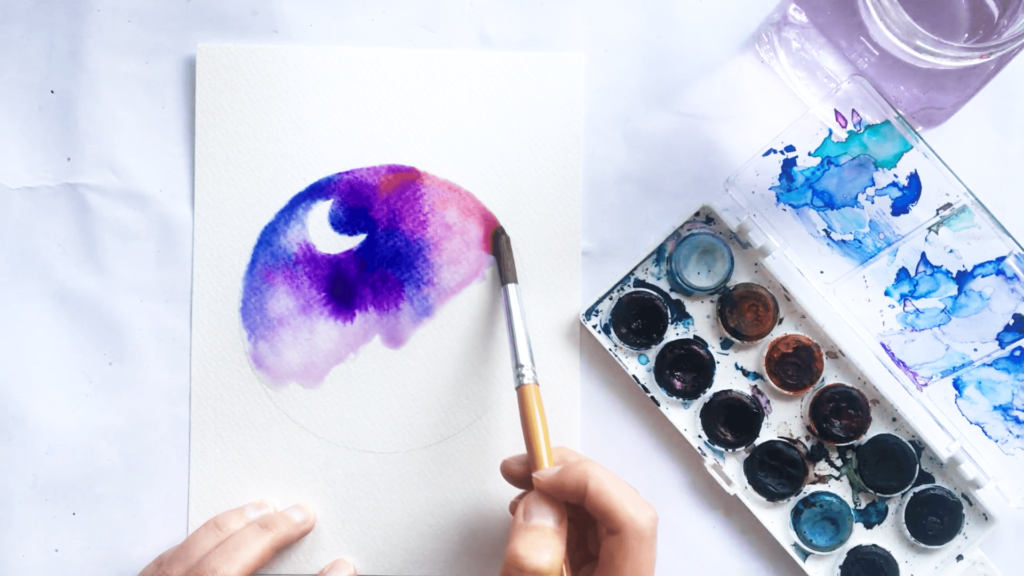
The only thing to pay attention to while painting the sky is to leave the bottom 1/3 of the background a little lighter, because we are going to add the leaves there and if the background is too dark, the leaves won’t stand out. You can do this by taking up less pigment in your brush, so the mixture on the paper is more diluted.
If you end up with an area that you find too dark, you can still remove some of the pigments while the surface is still wet, but you’ll have more trouble with it once it has dried. Just drop some extra water on the surface, rinse your brush, dry it on the paper towel and move your dry brush in the wet surface. The dry brush should act as a sponge, and lift the pigments along with the water, turning your colour slightly lighter.
Using this amount of water might make your paper buckle, particularly for papers thinner than 300 gsm (140 lb). This can cause the pigments to lie thicker in the valleys. If you want to remove these, you can use the same dry brush technique to „sweep” these extra pigments off the paper.
On the other hand, if the upper half of your circle could be darker, you can apply another layer of paint. If the area is wet, all you need to do is blot some extra pigments in the water, but once it has dried, you need to start the wetting process all over again.
If you are happy with your background, all you need to do is wait for the paper to dry. I hope you used a lot of water, which means this can take some time. If you are impatent, you can use a hairdryer to quicken this drying process.
Step 3 – Painting leaves with wet-on-dry
In this step, I apply a 2nd layer of paint on the dry surface – hence the wet-on-dry technique. For this step I use my smaller brush, so the result will be more delicate.
As I start painting the leaves on the dry surface you can see that the colours do not blend anymore. The edges are crisp, just like when I paint on dry, white paper.
3 shapes of leaves
When it comes to the leaves, you don’t have to think about complex shapes. I use 3 different variations:
- I paint the stem first, then add these little rice-shaped leaves on both sides.
- Again I paint the stem, but instead of rice-shaped leaves, I paint leaves like little raindrops, and the tip of the raindrop connects to the stem.
- I paint stems in different directions, and add tiny lines on both sides to imitate small leaves.
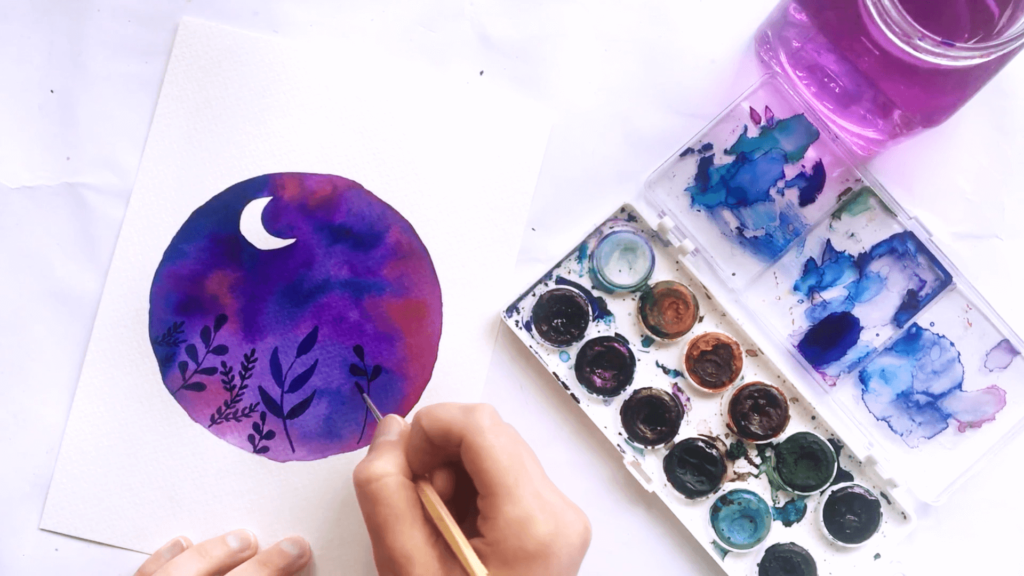
As for the colours, I used ultramarine blue and added a hint of brown to it, just to soften the brightness. I paint these quite thickly, so they are dark enough to stand out from the background.
I start painting from the middle and add the leaves on the left and right side of the background, because I know I can create a more balanced composition this way, but you can paint in any order you like.
If you are a bit unsure of yourself, you can also sketch the leaves in pencil before painting them, which you can later erase, once everything is dry. However, try not to stress too much about it: after all, shapes are whimsical enough in nature, so it’s alright to be spontaneous.
Step 4 – adding the stars
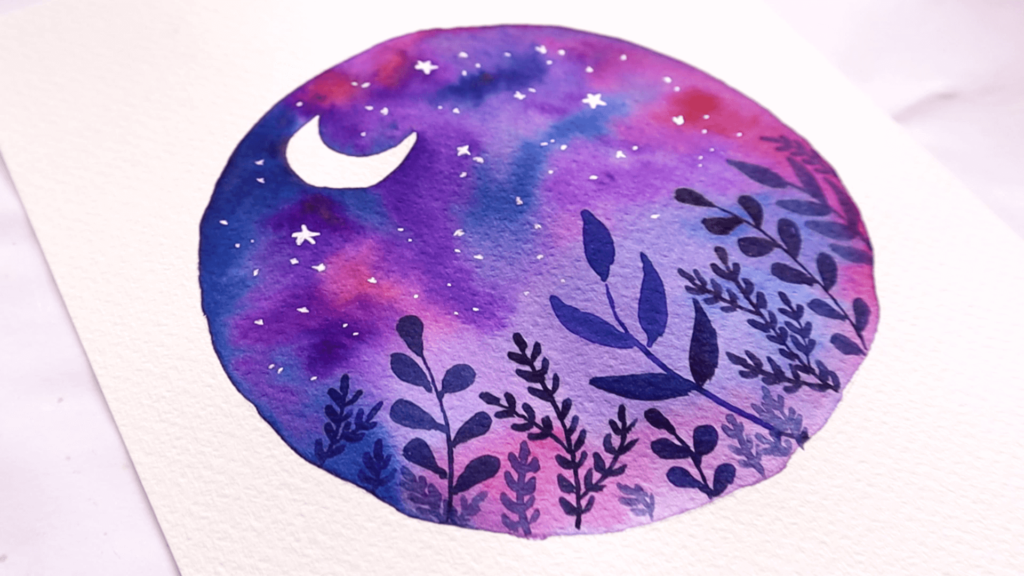
When you are done painting your leaves, it’s time to add the stars with your gel pen. At this point you don’t have to wait for your leaves to get dry, but pay attention so you don’t smudge the wet paint with the back of your hand.
You can paint little dots or x-es, or even tiny star shapes. The whole process is quite random, there is no need to follow any rules – actually when it comes to stars, this messy effect is quite realistic. I created smaller and larger stars as well, representing stars of different brightness.
Watching the painting process in video format may help you even more.
So, with this picture, you have managed to practice the 2 most used techniques in watercolour: wet-on-wet and wet-on-dry. If you paint this picture, don’t forget to share it on social and tag me @imeldagreens.
Don’t miss new posts on watercolour, subscribe to the newsletter!
QUESTION OF THE DAY: have you created your first watercolour painting yet, or are you still in the research phase?

Comment (1)
Gio
April 1, 2022 at 6:39 am
Grazie Imelda, molto interessante. Un bellissimo regalo ❤️ Buona giornata