How to get started with watercolour?
Have you fallen in love with watercolour? Do you feel overwhelmed with all the stuff you should learn just to get started? Well, this blog post is for you.
Watercolour is not a difficult technique, but you’ll have a much more enjoyable – and much less frustrated – learning process if someone walks you through the basics step-by-step. The good news is that this post will uncover these steps.
1. Choose the right materials
When you’re just starting out and don’t know whether you’ll like this technique or not, you don’t want to pay a lot of money on art supplies. Nevertheless, you don’t want to work with poor quality materials either because you wouldn’t feel like taking them out and practice, which is essential if you want to improve your skills.
One beautiful aspect of watercolour is that you don’t have to spend a lot of money to get started. However, there are a few supplies worth investing in, otherwise your watercolour painting will never look the way it should.
It is important to know that we differentiate between „student grade” and „artist grade” materials. Student grade supplies are cheaper and of lesser quality, but they are perfect for the beginner painter. Artist grade supplies are way more expensive – and consequently, better quality – but if you’re only getting started, student grade materials will do perfectly.
You basically need 3 important things for your starter kit:
- watercolour paint
- watercolour paper and
- watercolour brushes
Watercolour paint
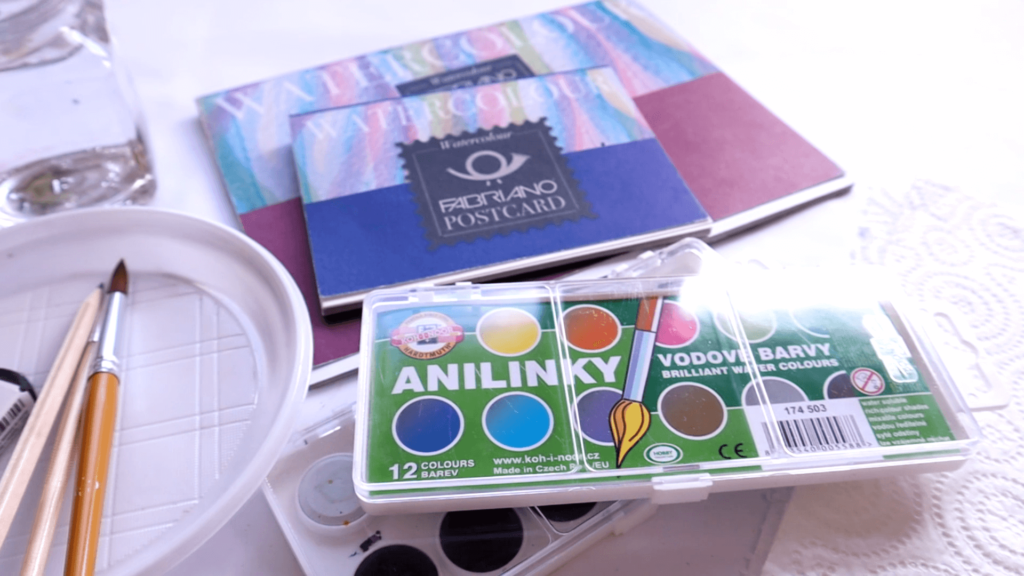
My favourite brand of watercolour paint is Koh-i-noor’s Anilinky. It’s definitely on the cheap end of paints, yet the colours are really bright and vibrant, and the paints are transparent. The colour selection also makes it perfect for practicing colour mixing. On the down side, its lightfastness is not brilliant, so it might be wise to digitize your work.
If you don’t have access to Anilinky, you can try Winsor & Newton’s Cotman series or Daniel Smith Extra Fine Essentials.
Learn more about the difference between student and artist grade watercolour paints here.

Watercolour brushes
It is pretty easy to go wrong with brushes when you are just starting out. Watercolour brushes are designed to hold the maximum amount of water and are therefore quite different from brushes created for thicker mediums like acrylics or oils. Again, you don’t need to spend an arm and a leg on artist grade brushes for your first experiments, synthethic student grade watercolour brushes are perfect. The best way to go is to pick 2 pointed round brushes, one in smaller (2-4) and one in larger (8-10) size and experiment. I have written an extensive article on watercolour brushes here. One of my favourite collections is Zen Art Supplies’ Black Tulip brush set, which will include all your basic shapes and sizes.
Watercolour paper
Watercolour paper is the third – and arguably most important material. Watercolour paper works differently with water than other types of artist papers, which enables you to work with excessive amounts of water. The quality of watercolour papers vary, so it is important to choose from a brand who specializes in art supplies, instead of buying them from any old store. Some artists argue that you won’t get good results with 25% cotton or 100% cellulose paper and you should always stick to 100% cotton pads, which are the best quality watercolour papers. I personally don’t agree with this, I still use 25% cotton paper a lot in my professional life. If I had to pick my favourite brand, it would be Fabriano’s Studio student grade watercolour papers.
If you want to learn more, read this detailed blogpost on watercolour papers.
2. Basic techniques
Once you have your materials, you can start experimenting. You can’t really avoid this step, you have to live with the fact that your first pictures will not make it to the MET, but the process can still be enjoyable.
When you start painting, there are 2 things you need to befriend:
- your brush and
- working with water
Using your brush
Round, pointed brushes are great because they are very versatile. You might want to try how you can paint a thin line with your thicker brush (psssst: by holding it vertically and pressing very lightly) or how you can paint thick lines by tilting it in your hand and pressing it harder onto the paper so the belly of the brush meets the paper.
How to use water
Sooner or later, knowing what different amounts of water does to your paint will become second nature to you, but here are two very basic techniques for you to practice.
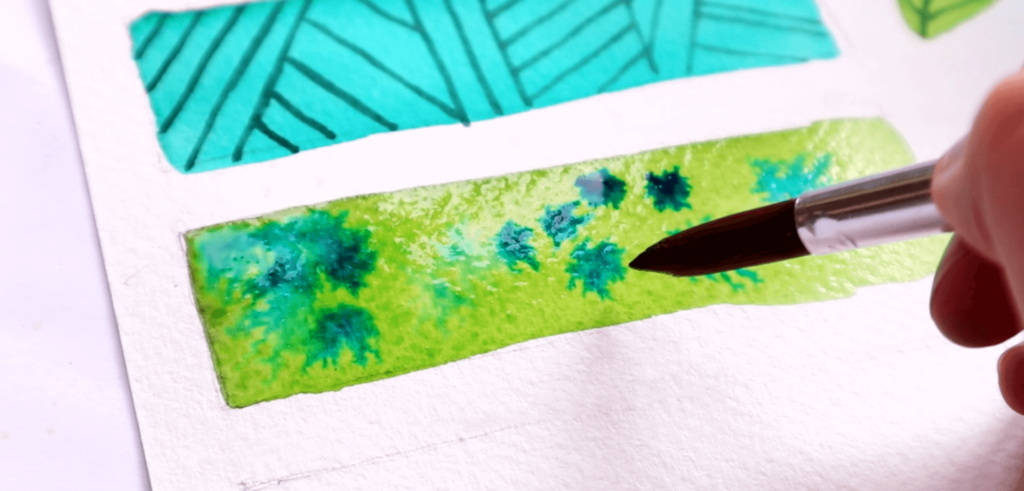
One is the so-called wet-on-wet technique. This basically means painting 2 layers of paint in a way that you paint the 2nd layer before the first one dries. Since watercolour paper does not absorb water immediately, it is possible for different colours to mix on top of the paper while the surfaces are still wet.
You can use the wet-on-wet watercolour technique for painting colour gradients. For example, I often use it for painting the sky, or if I want to give an interesting texture to a larger surface, or if I want a soft edge between two colours.

The other useful watercolour technique is called wet-on-dry. I think you’ve figured out what this means already: painting 2 layers of paint in a way that you paint the 2nd layer when the first one has dried completely. Painting on your blank, dry paper is also called a wet-on-dry technique. When you use this technique, your second layer has very crisp edges, the colours don’t mix anymore.
I use this technique when I don’t want two neighbouring areas to mix together (for example when a pink flower petal meets a green leaf) or if I paint a darker shape on a lighter background.
Learn to use the wet-on-wet and wet-on-dry watercolour techniques in this step-by-step tutorial! In this post we use these techniques to paint an entire watercolour piece. If you don’t want to miss new posts on watercolour, subscribe to the newsletter!
QUESTION OF THE DAY: what is your biggest fear when it comes to starting watercolours?

DISCLAIMER: Some of the links above may be affiliate links. If you purchase a product or service with the links that I provide I may receive a small commission. There is no additional charge to you! Thank you for supporting my blog so I can continue to provide you with free content.

