
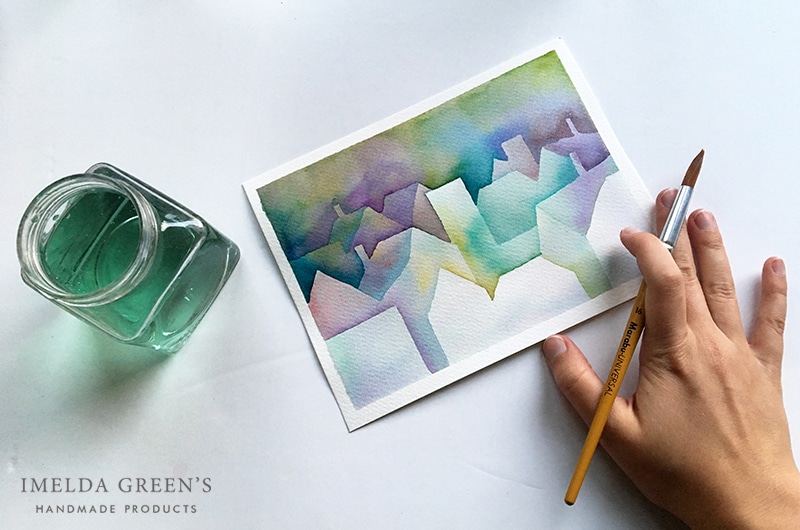
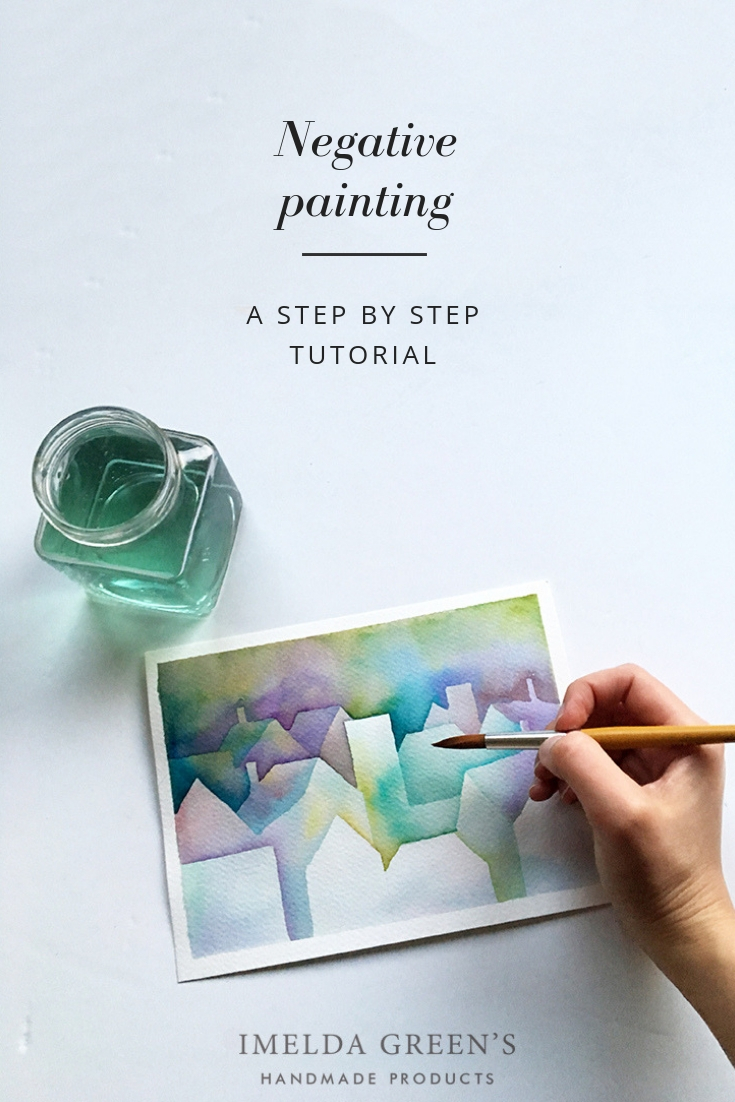
Watercolour painting class – negative painting
The beauty of watercolour mainly lies in the transparency of layers. But how do you actually reach this ethereal effect? I solved this question a couple of months ago when I met the negative painting technique on Hungarian designer, Hanga Katona’s instagram.
This technique is based on one of the rules of watercolouring: painting from light to dark. You can learn the negative painting technique if you paint these houses with me. Come along! If you prefer to see the steps in video format, click below.
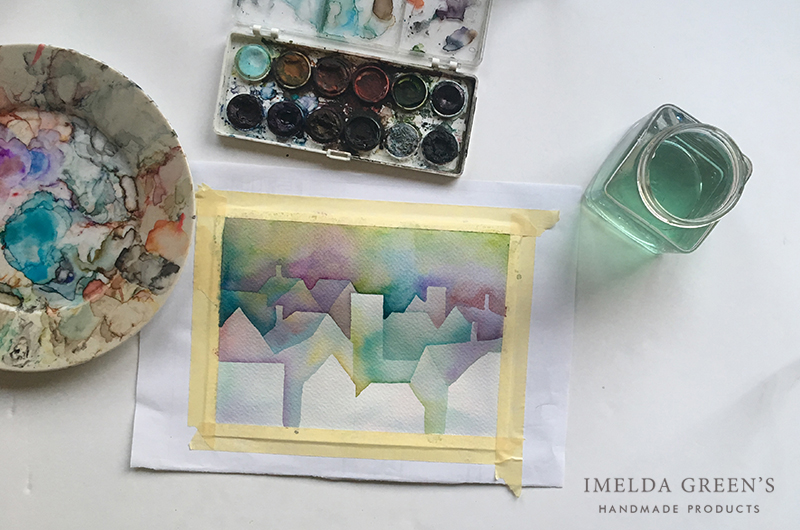
Supplies you need:
- watercolour paper (in this case I use 300gsm A6 size paper)
- watercolours or anilinie paint
- a thick, round brush (size 10-16)
- palette (you can use a plate from your kitchen, some old tile, or buy a palette in an art supply store
- water
- masking tape (I use the brand Thesa)
- tissues
- pencil and eraser

Step 0. – preparations
Draw a (very) light sketch of the houses, then use masking tape to stretch the paper. I have written a post about the right way to stretch watercolour paper here. Unless you use light weight paper, it is probably enough to use masking tape on the edges of the paper. This will (mostly) prevent the paper from buckling, as well as create a nice white frame around your painting.
Step 1. – the first layer of paint
When you are ready, wet your brush and apply a generous amount of water on the entire paper. Once it is thoroughly wet, pop some pigments into the wet surface and let them spread on the paper. If you are not satisfied, you can guide the pigments to move in the right direction with your brush. By the way, this is called a wet on wet technique.
You need to pay attention not to use dark colours first. If you use the paint very thickly already on the first layer, you will not be able to darken further layers. You can create lighter colours by adding more water to the same ammount of pigment.

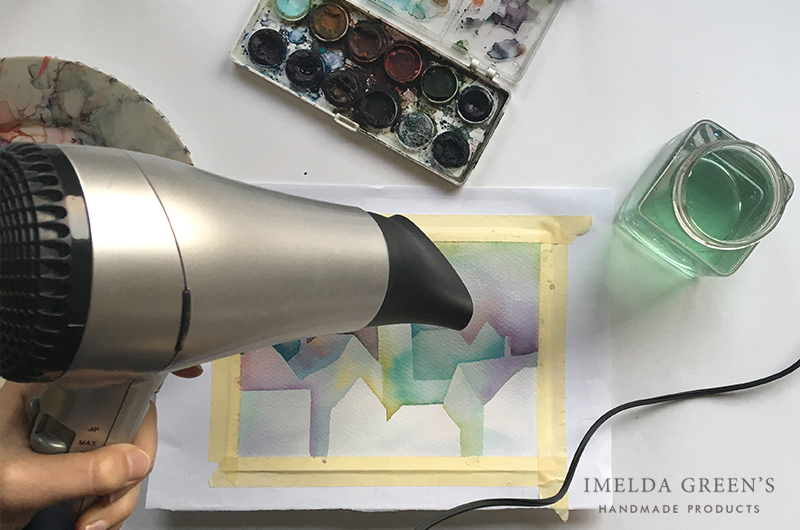
Step 2. – the waiting game!
About the most difficult – and at the same time, most important – step in negative painting is to wait while one layer dries before applying the next. If you start painting the next layer before the first one is completely dry, you will lose your outlines.
Once the painting looks dry, it can still fool you. You should always place your palm on the seemingly dry paper and if it feels cold, then it’s still not dry, so you should wait some more.
If you are impatient, you can always do something else while the paint dries, or you can use a hair dryer. In this case, you should blow air from at least 80-100 cm, so you don’t blow away the pigments along with the water (which is not catastrophic in this case, but it’s still good to know).
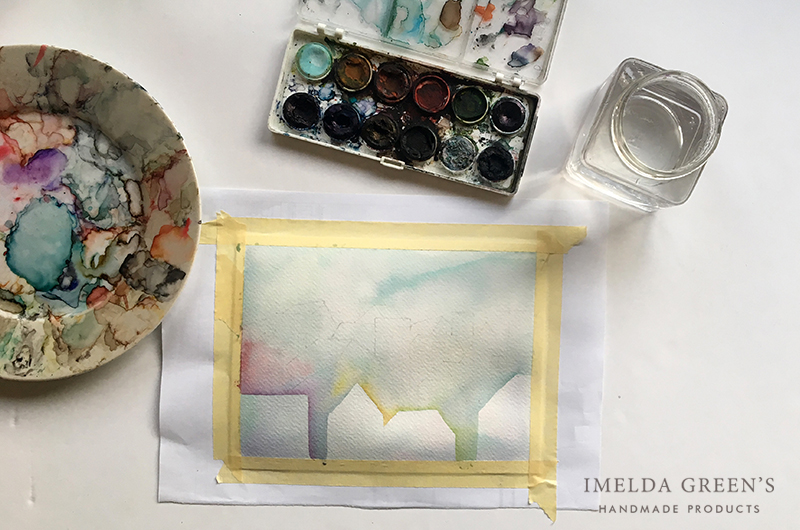
Step 3. – the second layer of paint
Once you are 100% sure that the first layer is dry, you can start painting the second. In this step, you basically do the same thing as in the previous one, with the difference that you do not apply water and paint on the entire painting, but follow the outlines of the first row of houses at the bottom of the painting.
You can use slightly darker colours on this layer, but it’s still wise not to use pigments too heavily. As you build up the painting, the double-triple layers of paint will get darker even if your brush is not particularly full of pigments.
The advantage of round, pointed brushes is that they can hold a fair amount of water (and paint) but you can paint small details with the tip – like the outline of the houses.
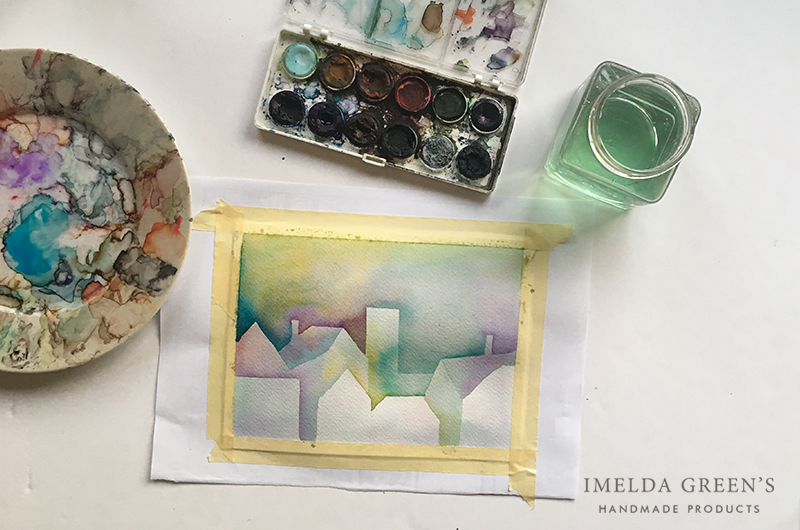
Step 4. – repeat
By now you understand the point of negative painting, so all you need to do is repeat the steps above.
It’s wise to always use mixed colours, otherwise the results can get somewhat garish. You can paint in monocrome (only using blue-s, for instance), but you don’t have to be afraid of blending different colours. In my case, yellows, purples and turqoise are the main colours.
The last step is to gently remove the masking tape.
If you are looking for a misty, wintery atmosphere, you can reverse the order: start painting with the back row of houses, and gradually come to the front, using darker tones. You can create a misty forest or mountains as well, using negative painting.
If you do this tutorial, please share it on instagram and tag me @imeldagreens.
I have also created a 30 minute long video course on negative painting on Skillshare. You can learn all about it here.

Comments (16)
Sharon Boswell
February 28, 2020 at 1:00 pm
Do you have an outline of the houses?
Imelda
March 2, 2020 at 11:34 am
No, I’m afraid not, but they can be any shape or form actually. I’ll think about creating one though, if there is interest. :)
Emma
March 30, 2020 at 12:43 pm
This is an exciting project that I would like to try😊😊
Imelda
March 30, 2020 at 12:45 pm
Good luck! :)
Samantha
April 20, 2020 at 10:47 pm
This is so creative and cool looking! I’m learning how to paint with watercolors and I like doing things that are different. Thank you for posting this!
Imelda
April 21, 2020 at 8:38 am
Thank you Samantha! I really hope you find valuable info for your watercolour studies here. :)
Yuki
June 24, 2020 at 11:39 pm
I tried and tried (more than 5 times), but can’t get the result. I get harsh lines or muddy splotch. How do you soften the color? I watched your tutorial on youtube tutorial over and over.. How do you spread colors with such soft misty effect?
Imelda
June 26, 2020 at 9:40 am
If your results are muddy, it might have to do with the colours you pick. So-called complementery colours can result in mud colour, when mixed. Here is some REALLY good material if you want to dive deeper into colour theory.
If you try to use lighter colours, the lines should not be that harsh. Remember that when you put on a second layer, it does not necessarily need to be darker than the previous one, because the layer underneath will show through (watercolor being transparent), hence making the 2nd layer darker than the first.
It is kinda difficult to help out without seeing the actual piece you make, but if this is still not helpful, you are welcome to drop me an email and attach a photo of your painting. :) Reach me at hello@imeldagreens.com
Yuki
June 26, 2020 at 11:24 pm
Thank you for such a detailed advice. I will try according to your advice, and will report back to you how it went. Your kindness is much appreciated.
Imelda
June 29, 2020 at 9:42 am
Looking forward to it. :)
cherri bollman
July 15, 2021 at 10:30 am
your paper sounds dry if you are getting harsh lines. Yu can use a spray bottle to mist it to keep it damp so the lines are soft and blurry. not too wet though. starts with fresh paper and get a big flat brush and cover the whole paper in water, let sit a couple minutes so it’s just damp, you don’t want the water to be pooling or dripping if you hold it upright.
Imelda
July 20, 2021 at 10:40 am
Thank you for the advice. I suppose it all depends on the effect you want to create.
Amanda
January 1, 2021 at 6:59 pm
What brand of water colour paper do you use? Having a hard time finding one I like.
Imelda
January 2, 2021 at 12:48 pm
Hello! I personally use and recommend Canson’s and Fabriano’s watercolour papers, because even their student quality papers are worth it, but I’ve heard people also like Arches.
Karla
December 10, 2023 at 7:29 pm
Hi Imelda,
did you create a shareable outline of the houses? thanks!
Imelda
December 11, 2023 at 9:27 am
Hello Karla, no, I’m afraid I haven’t – as of yet. I’ll think about it though, you are not the first one who asks.