Watercolour painting class – abstract galaxy

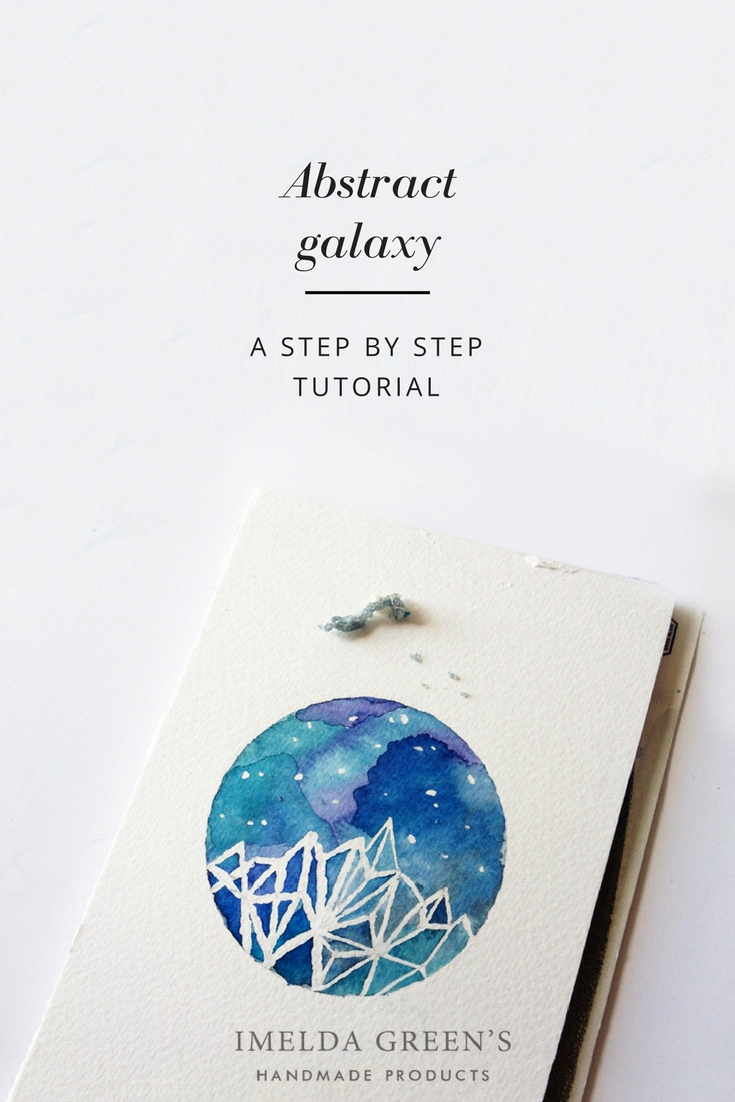
Up to this day I am not entirely sure whether this is an ‘abstract mountain resort’ or ‘spider’s web in front of a galaxy’, but we can agree on one fact: today we are doing a minimal style painting. You might have met this image before in my post about masking fluid, as this painting was my first attempt at using this fab (?) accessory – probably this is the reason why all the lines quiver. But with all this said, I really advise trying this material, and this is why I put together this little tutorial. So this is how you create the web in front of the galaxy (or whatever) painting:
Supplies you need:
- watercolour paper (I’m still using my A6 Canson block, with 300g/sm paper)
- watercolours or aniline-paint
- a middle sized round brush
- a saucer to use as palette
- water
- masking fluid and a toothpick
- pencil and eraser
Step 1 – draw the pattern and apply masking fluid
(You might notice that unlike my other tutorials “Step 0” of sticking down the edges of the paper is missing. The reason behind this is that this time we are not using so much water and so it is more unlikely that the paper would curl up).
Draw the pattern with pencil: draw a circle (you can use a caliper if you are fussy about the perfect circle), then draw an edgy zig-zag around the middle, which will be the top of the mountains. Then fix a couple of points under the line, and connect each point with all neighbouring points. Aesthetics is more important than the rule, you can skip connecting some points if it were to ruin the composition. Dip the toothpick into the masking fluid and re-trace your lines. You can read more about masking fluid here, but it basically means that the surfaces covered in this material will remain white, even when you paint over them. The material may seem a bit dodgy at first, so if you use it for the first time, you want to try it on a scrap of paper first, to see how thick and how even lines you can produce (this is the step I skipped, and so ended up with the enclosed result ;)).
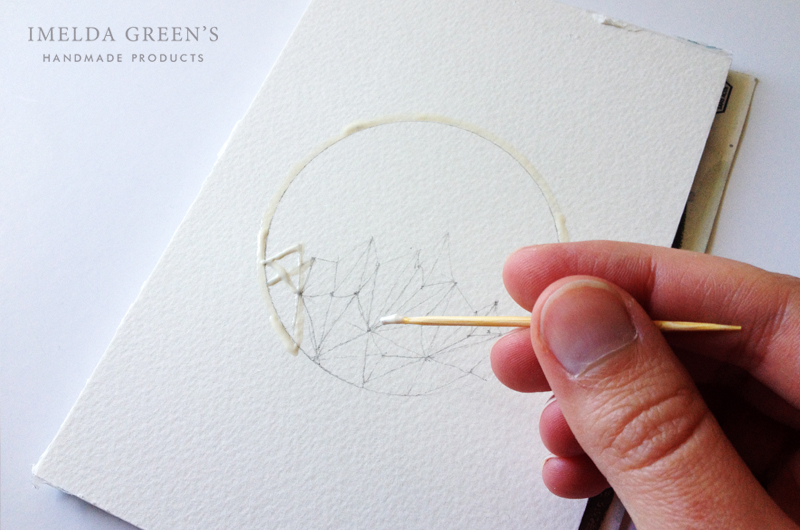
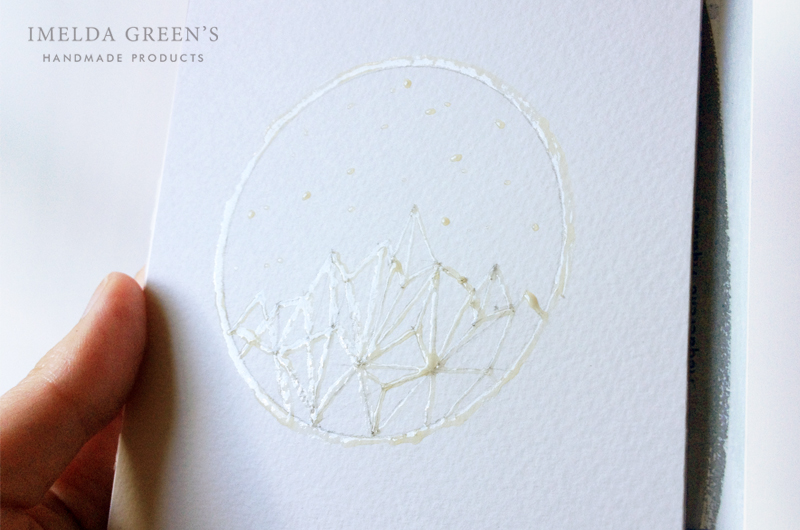
Once you’ve re-traced the lines, you can place some dots above the mountains as stars/snowflakes. Wait a couple of minutes until the masking fluid gets dry. You can start painting once the masking fluid reaches a yellowish colour and a rubbery consistency.
Important! Masking fluid does not desolve in water, therefore it is very difficult to remove it from brushes later (it can actually destroy your brush). This is why I used a toothpick, but if you find it uncomfortable to work with such a tiny piece of wood, you can also use a dip pen or a bamboo pen, it is fairly easy to remove dried masking fluid from those.
Step 2 – painting (a.k.a. the most exciting part of the process)
Mix your favourite sky-colours (or any colours, really) and paint the surface within the circle. I didn’t plan anything before, I ended up with the cloud-like shapes as the paint dried before I applied a 2nd layer of paint. I used the warm and cool tones of blue, but you can reach a very interesting result if you put together two completely different colours and let them blend into each other (a bit like in my watercolour splash tutorial).
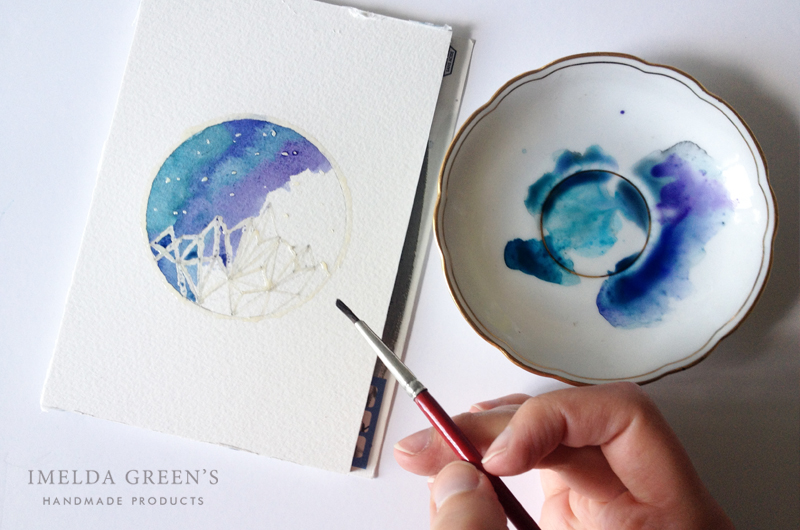
After painting, all you do is wait, because you cannot remove the dried masking fluid until the paint is completely dry. If you are too bored, you can check what I do in those 5-10 minutes while I’m waiting for the paint to dry. Once you think your picture is ready, place your palm on the surface: if it feels cool, wait a couple of more minutes!

Step 3 – remove masking fluid
If you are absolutely sure that your painting is completely dry, you can start removing the masking fluid. Start rubbing the material with the tip of your finger, you’ll see, it is very easy to remove. When I used masking fluid for the first time I was a little worried abut this process and was ready for all sorts of catastrophes, but there none came. I learned the exact movements from this video.
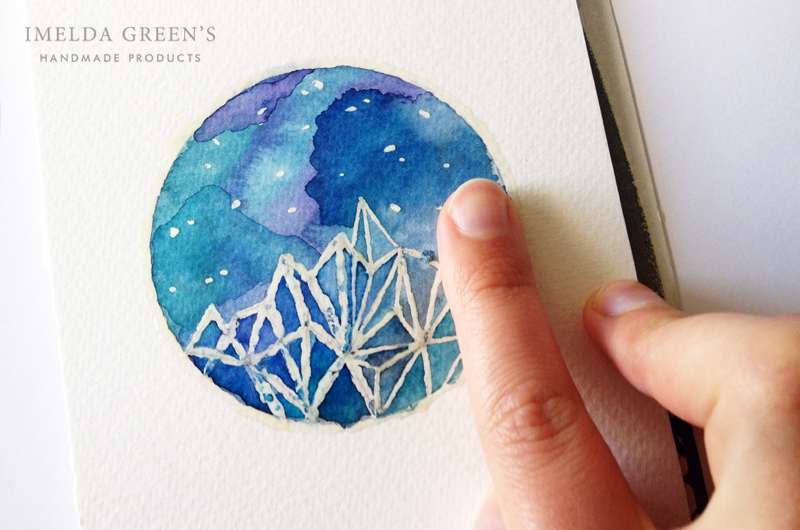
And this is it guys, you are ready! Isn’t it easy?
If you create this artwork, please upload it to Instagram and tag me to see it (@imeldagreens). I’m so curious of your works! <3


Comments (7)
Helene
August 24, 2017 at 9:02 am
Absolutely love this!! It looks so elegant and minimal:) Blue is my favourite colour (as you can probably see from my blog header), and this fits right into my favourite colour scheme:) I wish I were as artsy as you:) Thanks for sharing!
Imelda
August 28, 2017 at 7:20 am
Your blog header is super cute, Helene!
Moe
August 24, 2017 at 4:50 pm
What an easy tutorial! I’m going to share this with my Creative Facebook group! Thank you for taking the time to share
Imelda
August 28, 2017 at 7:19 am
Oh, thank you Moe! Maybe I can also join?
Rajlakshmi
September 4, 2017 at 2:14 pm
It looks so beautiful. I loved your tutorial. Painting is something I dabble with too… After seeing this, I would definitely like to try it 😀
Mel
September 4, 2017 at 3:54 pm
Masking fluid is such a great thing but I cannot stand the smell of it! I’ve only used it a couple of times and love how it gives me the freedom to go nuts with the paint or ink without worrying about getting it in places that are meant to be left untouched. The image you created is so pretty, I love the colours of it.
Imelda
September 6, 2017 at 11:49 am
Thank you Mel. I actually haven’t noticed much of the smell..